
This blog post was originally published in September 2018 and last updated in July 2024 to reflect the closure of Treetopia and remove a previous giveaway.
Mark 2018 as the year it finally happened: a spooky little Halloween tree!
I've been dying (pun intended) to make a Halloween tree happen, so when my new friends at Treetopia invited me to join the ranks of their Halloween DIY Queens and Kings I knew I had to say yes!
This week I'm joining a group of amazing crafty bloggers creating their own unique Halloween trees. Check them out here:
Since 2018 marks the 200th anniversary of the publication of Mary Shelley's "Frankenstein" (and because it was one of my favorite reads while earning my English degree...), I decided to give my tree a literary spin!
Here's how it turned out.
My Frankenstein Halloween Tree


I'll admit, the details are subtle...but it fits me perfectly - quietly in the corner doing my own cool thing.
I'm also excited to showcase this at my annual Halloween party this year. (The tree might be a HUGE nod towards my costume...wink wink!)
Here's how I made my Frankenstein-inspired tree:

Frankenstein Ornaments
I started with a vision: I wanted ornaments with bolts sticking out the side to suggest Frankenstein. I didn't want them to have faces - just bolts. So...here's how we accomplished that!

My dad kindly donated a bunch of bolts to my project he had in the garage. They'd never been used because they were too long for most of his projects, so we had to do a bit of work to make them a more appropriate size for my project!
We marked each one at around 1 1/4 inches long.
Then we used a vice to hold the bolt while sawing off the end.
Aaaalmost there!
For safety, we filed the end - no cut fingers on my watch! (And note the use of a glove - that's how hot the bolt was after sawing it in two.)

Then using beaded ornaments from Treetopia, I created my Frankenstein ornaments!
Three in the set were already a gorgeous lime green, so I grabbed a grass green and forest green spray paint to color the other ornaments.
Once the paint was dry and the bolts were cut, I gathered everything together.
Using a screwdriver, I pierced a hole in the sides of each ornament. (They're foamy on the inside!)
Then I inserted the bolts for my Frankenstein look!

Decoupage Ornaments
Next, I knew I wanted to decorate using book pages from an actual copy of "Frankenstein" and, well, decoupage is ALWAYS a fun time in my book...

I started with glass ornaments from Treetopia. I took the loops for attaching ornament hooks off before getting started and - SOB - pulled pages out of two copies of "Frankenstein" I bought at a used booked store.
Using a paintbrush, I coated the ornament in a thin layer of Mod Podge.
Then I tore my book pages into strips are started layering them onto the ornament. This got messy, but that's part of why I love playing with Mod Podge - you don't have to be perfect. Just keep layering!

Paper Chain
Part of what got me excited about doing a Frankenstein tree was using book pages for decor, so these old school paper chains were a must! My mom was kind enough to demo this how-to for me.

Fold your book pages in half twice length-wise.
Cut pages into strips along the folds.
Staple the top and bottom of the pages together to create a loop, then continue by looping each new strip through the previous one before stapling.
Continue until you've created a chain to wrap around your tree!

Paper Rolls
I definitely overestimated how few pages I would use for this project, and I felt my tree needed a little extra detail...so I used some of my remaining pages to create paper rolls.
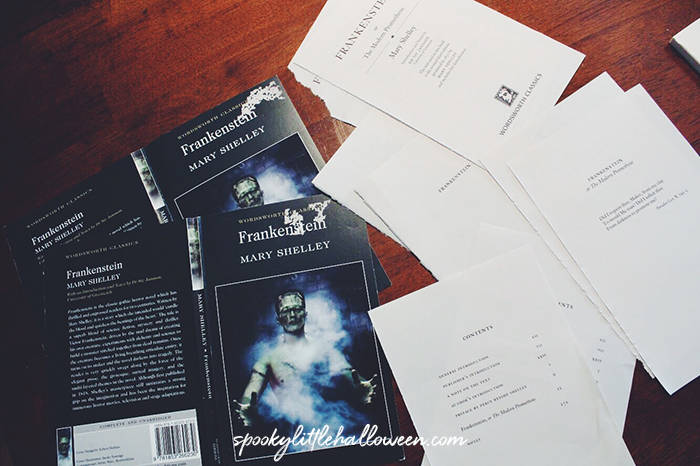

I rolled the pages from bottom right corner to top left corner, careful to roll the bottom section tighter than the top.

Then I taped the exposed page corner down! Super easy.

Lightning Bolt Topper
And finally, because NO Frankenstein can be created without a bit of lightning...a silver bolt seemed like the perfect thing to top off my tree.

I freehanded a bolt on a scrap piece of cardboard.

Then we used an Exacto knife and metal ruler to cut it out (thanks for the demo, Dad!) before spray painting the bolt silver.

Halloween Tree Skirt
I may have slightly overlooked this detail in my prep...so I improvised! I used some leftover Halloween fabric from PJ pants my mom made me last year and wrapped it around the base of my tree.

And then to add a bit of Halloween fun, I included one of my plugin jack-o-lanterns, a foam tombstone and my cauldron I created for last year's front door display.


I really love how my Frankenstein-inspired Halloween tree turned out and can't wait for all my Halloweenie Roast guests to see it in person!

WHAT KIND OF HALLOWEEN TREE WOULD YOU DECORATE?
As always, let me know in the comments!