
This post was originally published in September 2018 and last updated in August 2026.
There's an image of a smoking jack-o-lantern that goes around on Instagram every so often. And each time I see it, I think "That can't be THAT hard to pull off...right?"
And the answer, no it isn't!
In fact, this is probably one of the easiest DIYs I've ever shared.
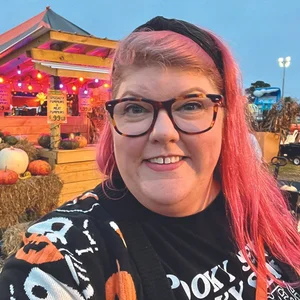
I decided to give this a try when I was getting ready to launch the redesign of my blog, and my BFF Amanda took some new photos for me. My friend Tammi offered up her house located on bit of wooded land as the perfect backdrop and, we had the BEST time taking photos:

And while we were at it, I decided I finally wanted to give the smoking pumpkin a try. Let's jump right to it, here's how it turned out:

Supplies:
Jack-o-lantern
Carving tools
Smoke grenades
Camera for photos

Directions:
First, we'll need to buy some killer smoke grenades. In case you've never seen them before, smoke grenades are operated via a wire pull tab. When pulled, the grenade (thick cardboard tube) emits colored smoke for 60-90 seconds.

Once your smoke grenades arrive, it's time to carve up your jack-o-lantern. (Find my best tips here!)

Next, find an open area with plenty of ventilation to do your smoking pumpkin. Be sure to read the instructions on your smoke grenade packaging thoroughly before use, including the safety warnings!
A few things you need to know:
While you aren't lighting these, the tube housing the smoke CAN get warm quickly. Be careful when handling during and after.
Also, while you aren't lighting these...there IS a spark that happens when the wire pull is released. Be smart. Do not use these in dry areas and always have access to plenty of water on hand. All it takes is one spark to ignite a fire.
Smoke grenades have a short life, so if you plan to take photos you'll want to be ready as soon as you activate the grenade.
The smoke is heavily pigmented. It WILL color the interior of whatever you put it in and may not wash out completely.
Standing in the smoke may leave colored residue on your clothing. Wear something it's okay to get dirty, possibly permanently.
The smoke can irritate your eyes. Again, work with them outdoors in open areas to ensure plenty of ventilation.

To use the smoke grenades, I had to remove the plastic wrap, locate the wire pull tab and pull. HARD.
Sometimes, as evidenced above, it takes a few tries!

Once the smoke grenade was "lit", I dropped it into the pumpkin and we were off and running for photos!


(That's my "OMG it actually worked!" face, in case you were wondering.)


Tips for Smoking Pumpkin Taking Photos:
And because I want you to have a TON of amazing photos...here are a few more tips for capturing GREAT photos.
Plan ahead. Before you start, know what types of photos you're trying to capture. Once you "light" your smoke grenade, there's no way to stop it, and you don't want to waste one scrambling to figure out angles or poses. (This is even more important if you're taking photos like the one I shared above! It took two rounds of smoke grenades before we got this process figured out.)
Move around. Every 10 seconds or so, I would step in a different direction to clear the smoke and give us a fresh pumpkin face. Make sure you have LOTS of space so you can keep moving as needed.
Work quickly. Again, these grenades only give you 60-90 seconds of billowing smoke. While the smoke will hang in the air, you truly only have those 60-90 seconds to capture an image like the one above. If you aren't ready to go you'll miss your shot.
Use a fast shutter speed. If you're an amateur photographer, you might consider using the sports setting to capture quick action and get in more shots. On an iPhone? Hold down the camera button to activate the burst setting and capture several photos in a row.
Avoid windy days. You'll lose the effect of the smoke hanging in the air with even the smallest breeze. Shoot photos on a day that's as still as possible.
Buy more grenades than you need. I felt like purchasing six smoke grenades was overkill, but I ended up going through four of them between my pumpkin and individual photos, and I was glad to have extras to get all the photos I wanted.

So...what do you think of my smoking pumpkin?
Will you be giving it a try this Halloween season? If you do, be sure to share a photo on social media and use the hashtag #spookysmokingpumpkin or tag me in your post! I'd love to see what you guys come up with.
Looking for more Halloween DIY ideas? Be sure to check out my DIY section of the blog.