
This content was originally published on Patreon in February 2024.
Here’s a secret about content creation: sometimes you just don’t feel creative enough to…create.
I’ve found myself in this headspace for the better part of two years—likely because there’s been so much “real life” stuff taking up real estate in my brain.
But also because there is so much pressure to get creations PERFECT when you’re the content creator.
I’ve realized in the last few months that it’s rare that I create just to create. So, as a new year started, one of the things I promised myself was that I would do a better job of being creative just for fun. No obligation to post or share. It didn’t even have to be spooky.
I would just create to enjoy the process, not the product—because the process is really the fun part, isn’t it?
This particular project went through a few iterations. Initially, I was going to keep it simple: grab some cheap Valentine candy heart boxes and paint them into Halloween characters (a pumpkin, a ghost). Then I upgraded to painting spooky conversation hearts.
But I wasn’t loving it. It felt generic and done. Fun to see someone’s iteration? Sure. But not terribly original. (There’s that self-induced pressure!)
Then I went to a local creativity studio for a class in the hopes it would spark something, not for this project but my own creativity as a whole.
And it did!
We focused on writing and drawing exercises in the class, but it got me thinking about this phase in my late teen years when I was drawn to making collages with old magazines. I would scour issues looking for pages with certain colors, then hunt for the perfect letters to spell out song lyrics.
It wasn’t an original idea, but I always enjoyed the creative process.
Once that magazine collage popped into my head…I knew I was going to use this heart box DIY as a create-to-create exercise…and hope they turned out kinda cute to share on Patreon.
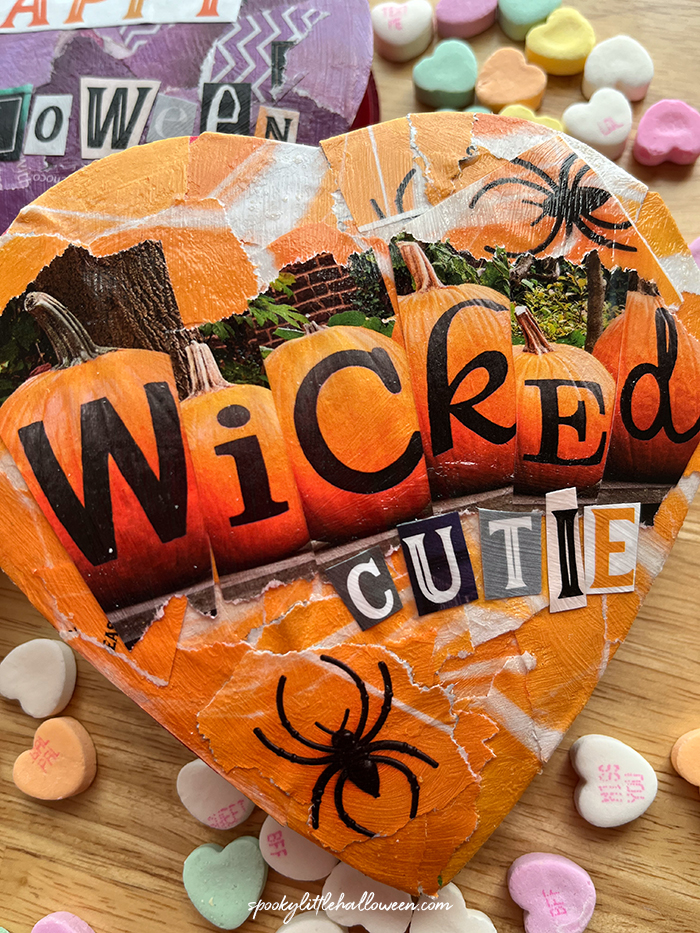
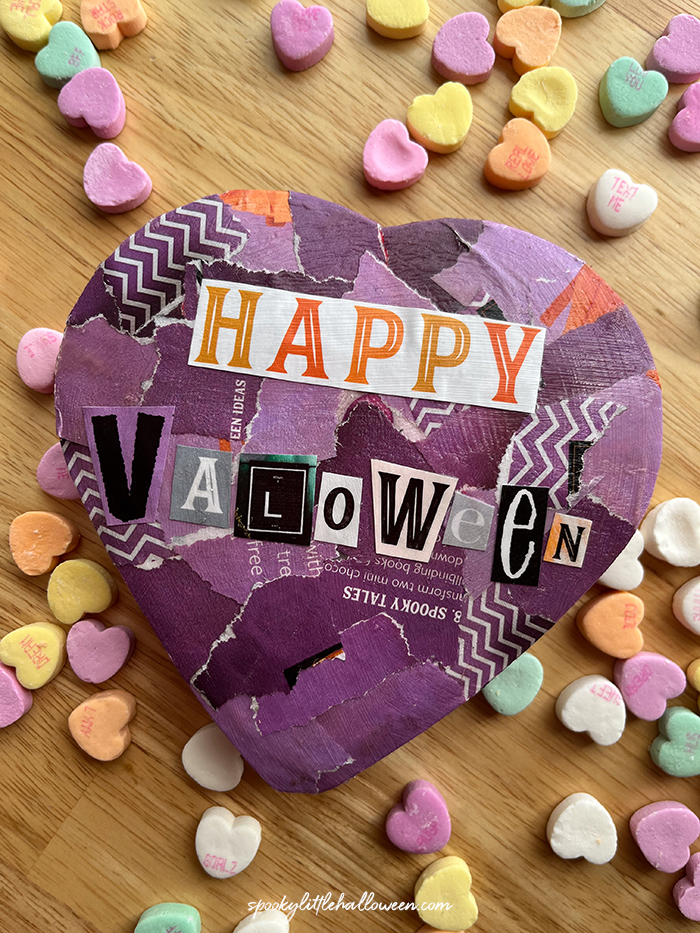
I think I succeeded! They aren’t groundbreaking, earth-shattering, or maybe even that original. But damn, these were fun to make! And sometimes, that’s all you need from a project.
How to make a Valoween conversation heart collage

Supplies
Heart-shaped box of your choosing (mine were $1.99 chocolates from Target)
Magazine
Mod Podge
Sponge brush (get a cheap one)
Scissors
Instructions
I suggest starting with planning your design. You can use my spooky conversation heart idea and select a solid color. You might consider collaging Halloween icons like a jack-o-lantern face, a ghost, or even turning your heart into a Valoween candy corn motif. There’s no wrong way to do this!
Once you have your design, flip through your magazine for pages with large sections of the colors you want. I usually look for 2-3 variations of each color to give the collage a little dimension. You could also use varying color shades for an ombre effect or mix up several colors if it fits your vibe.
Rip out the full pages, then rip the pages into smaller pieces. Mine were roughly a half-inch in size. This doesn’t have to be exact. You also don’t have to rip everything - I just like that look for these projects. Cut up the pages with scissors, if you prefer neater edges.
Using the sponge brush, spread a thin layer of Mod Podge onto a section of your collage surface and begin adding magazine pieces. I find it’s best to work in small sections so the Mod Podge doesn’t dry too quickly and get tacky.
Continue until the entire collage surface is covered with magazine pieces. Then cover the entire collage with a thin coat of Mod Podge using your sponge brush. I find this helps smooth down any edges and gives the surface an overall consistent finish at the end.
Set the collage aside and work on cutting out any letters you want to use for phrases. Look for full words or phrases in a single font, or mix it up and use varying letters. You might also consider looking for any small images (like my spiders and bats) you can add as decorative details.
After the collage surface has dried for 20-30 minutes (you can usually eyeball this with Mod Podge, look for it to get glossy), spread another thin layer of Mod Podge across the surface using the sponge brush where you’ll add your lettering. Gently place the letters, then carefully go over the top of them with another layer of Mod Podge. Include any decorative details in this process as well.
Smooth down any edges a final time before allowing the collage to fully dry for 1-2 hours. Then, enjoy your project as a gift or decor.

Tips
You can use ANY magazine for this! I just happened to have a duplicate Halloween magazine in my collection, so I used that. (So handy!)
You could substitute liquid glue (like Elmer’s) for this, but I find that the original formula of Mod Podge (there are easily 20+ variations these days) works well for this project. I grabbed mine at Michaels.
Overall, I find sponge brushes to be a better tool when working with Mod Podge than bristled brushes but use what you have. Use cheap or old brushes - this isn’t a project for the fancy stuff.
On a similar note, I usually find that using my fingers to spread the Mod Podge and smooth magazine pieces becomes easier once I get into the project. Don’t be afraid to get messy—Mod Podge peels off your fingers and surfaces easily with a bit of warm water. 😊
When selecting magazine pages, don’t just look for solid color - consider pulling pages with images that show the color in a texture to add some visual interest. (Ex: green grass, pink fabric, orange pumpkins)
I love the idea of customizing a box of chocolates for a Valoween gift, but you could easily use this idea to make decor as well. Grab a wood heart plaque, sign, or box at your favorite craft store and use this same DIY to create a gift or decor.

Looking for more Valoween ideas?
I’ve got a ton in the archives, but here are a few of my favorites: